P › P.3 How to set up GTM for GetServerSide
Create or confirm the GTM account, create the web and server containers, and make sure the rollout team can edit and publish the right containers.
GTM stands for Google Tag Manager. In this guide, GTM is where you prepare the web and server containers used during the setup and validation flow.
GTM stands for Google Tag Manager, the tag-management product used in this setup for the web container and the server-side container.
The app needs access to your existing web GTM container to scan and classify your setup. A server container can be created later during the setup workflow if you don’t have one yet.
For this setup, you should have or prepare:
- GTM account access
- Your existing web GTM container for the site
- Workspace and publish access for the people doing the setup
- A server GTM container (can be created later during setup if needed)
Walkthrough: Create web and server containers in GTM
This walkthrough shows creating both containers. This is an abbreviated walkthrough and does not correspond exactly to the detailed steps below.
-
1
Create or confirm access to the correct GTM account
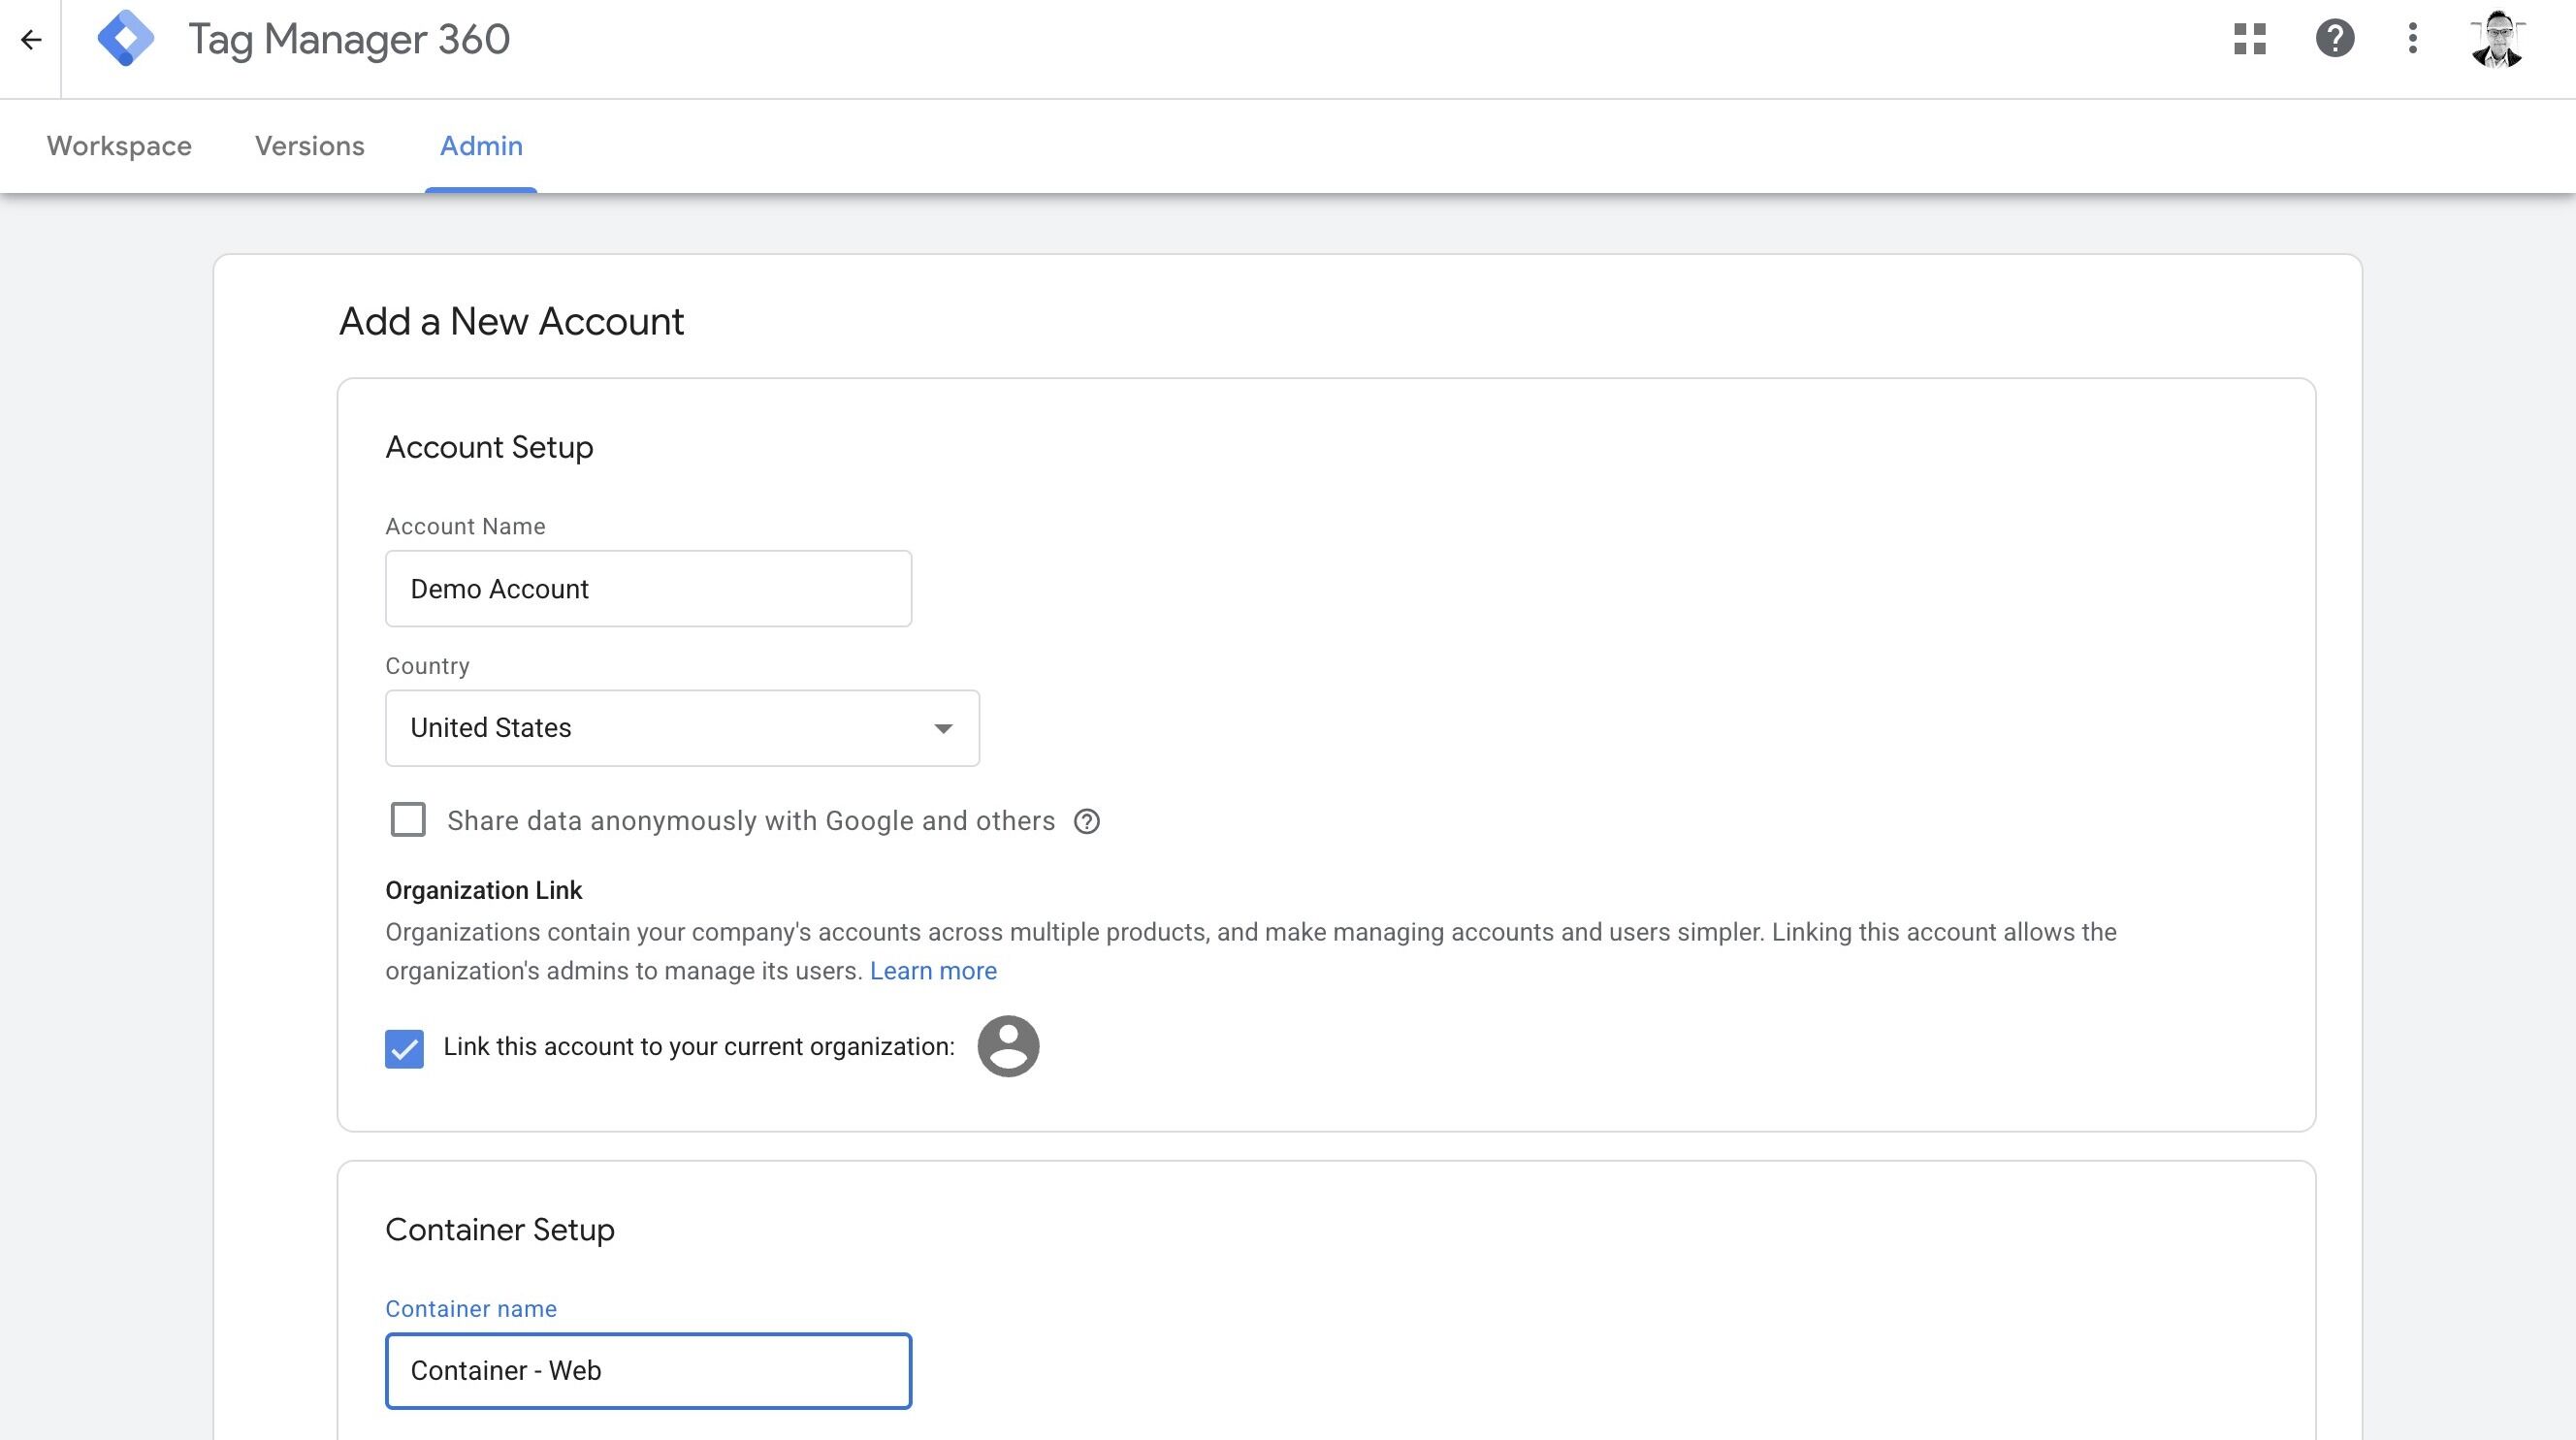
Before you can create or manage GTM containers for this guide, you need access to the right GTM account. If the organization already has GTM in place, confirm you are in the correct account and can create or edit containers there. If not, create the GTM account first so the containers have a home.
The account should be stable enough that the same team can maintain both the web and server containers after the initial rollout.
To create or confirm the GTM account:
- Open tagmanager.google.com and sign in with the Google account you will use for setup.
- If GTM has not been set up yet, create a new account for the organization.
- If an account already exists, switch to the correct one and confirm you have permission to create or edit containers.
- If publishing or admin access is controlled by another team, bring them in before the implementation work starts.
-
2
Create or confirm the web GTM container for the site
The web container is the browser-side GTM container already associated with the site, or the new one you will use if the site has not been set up in GTM yet. This guide later validates and configures the web container, so you should know exactly which one owns the browser-side tags.
The walkthrough above shows creating a new container. If your site already has a production web container, decide whether this rollout should reuse that container or whether a fresh container is safer and easier to reason about.
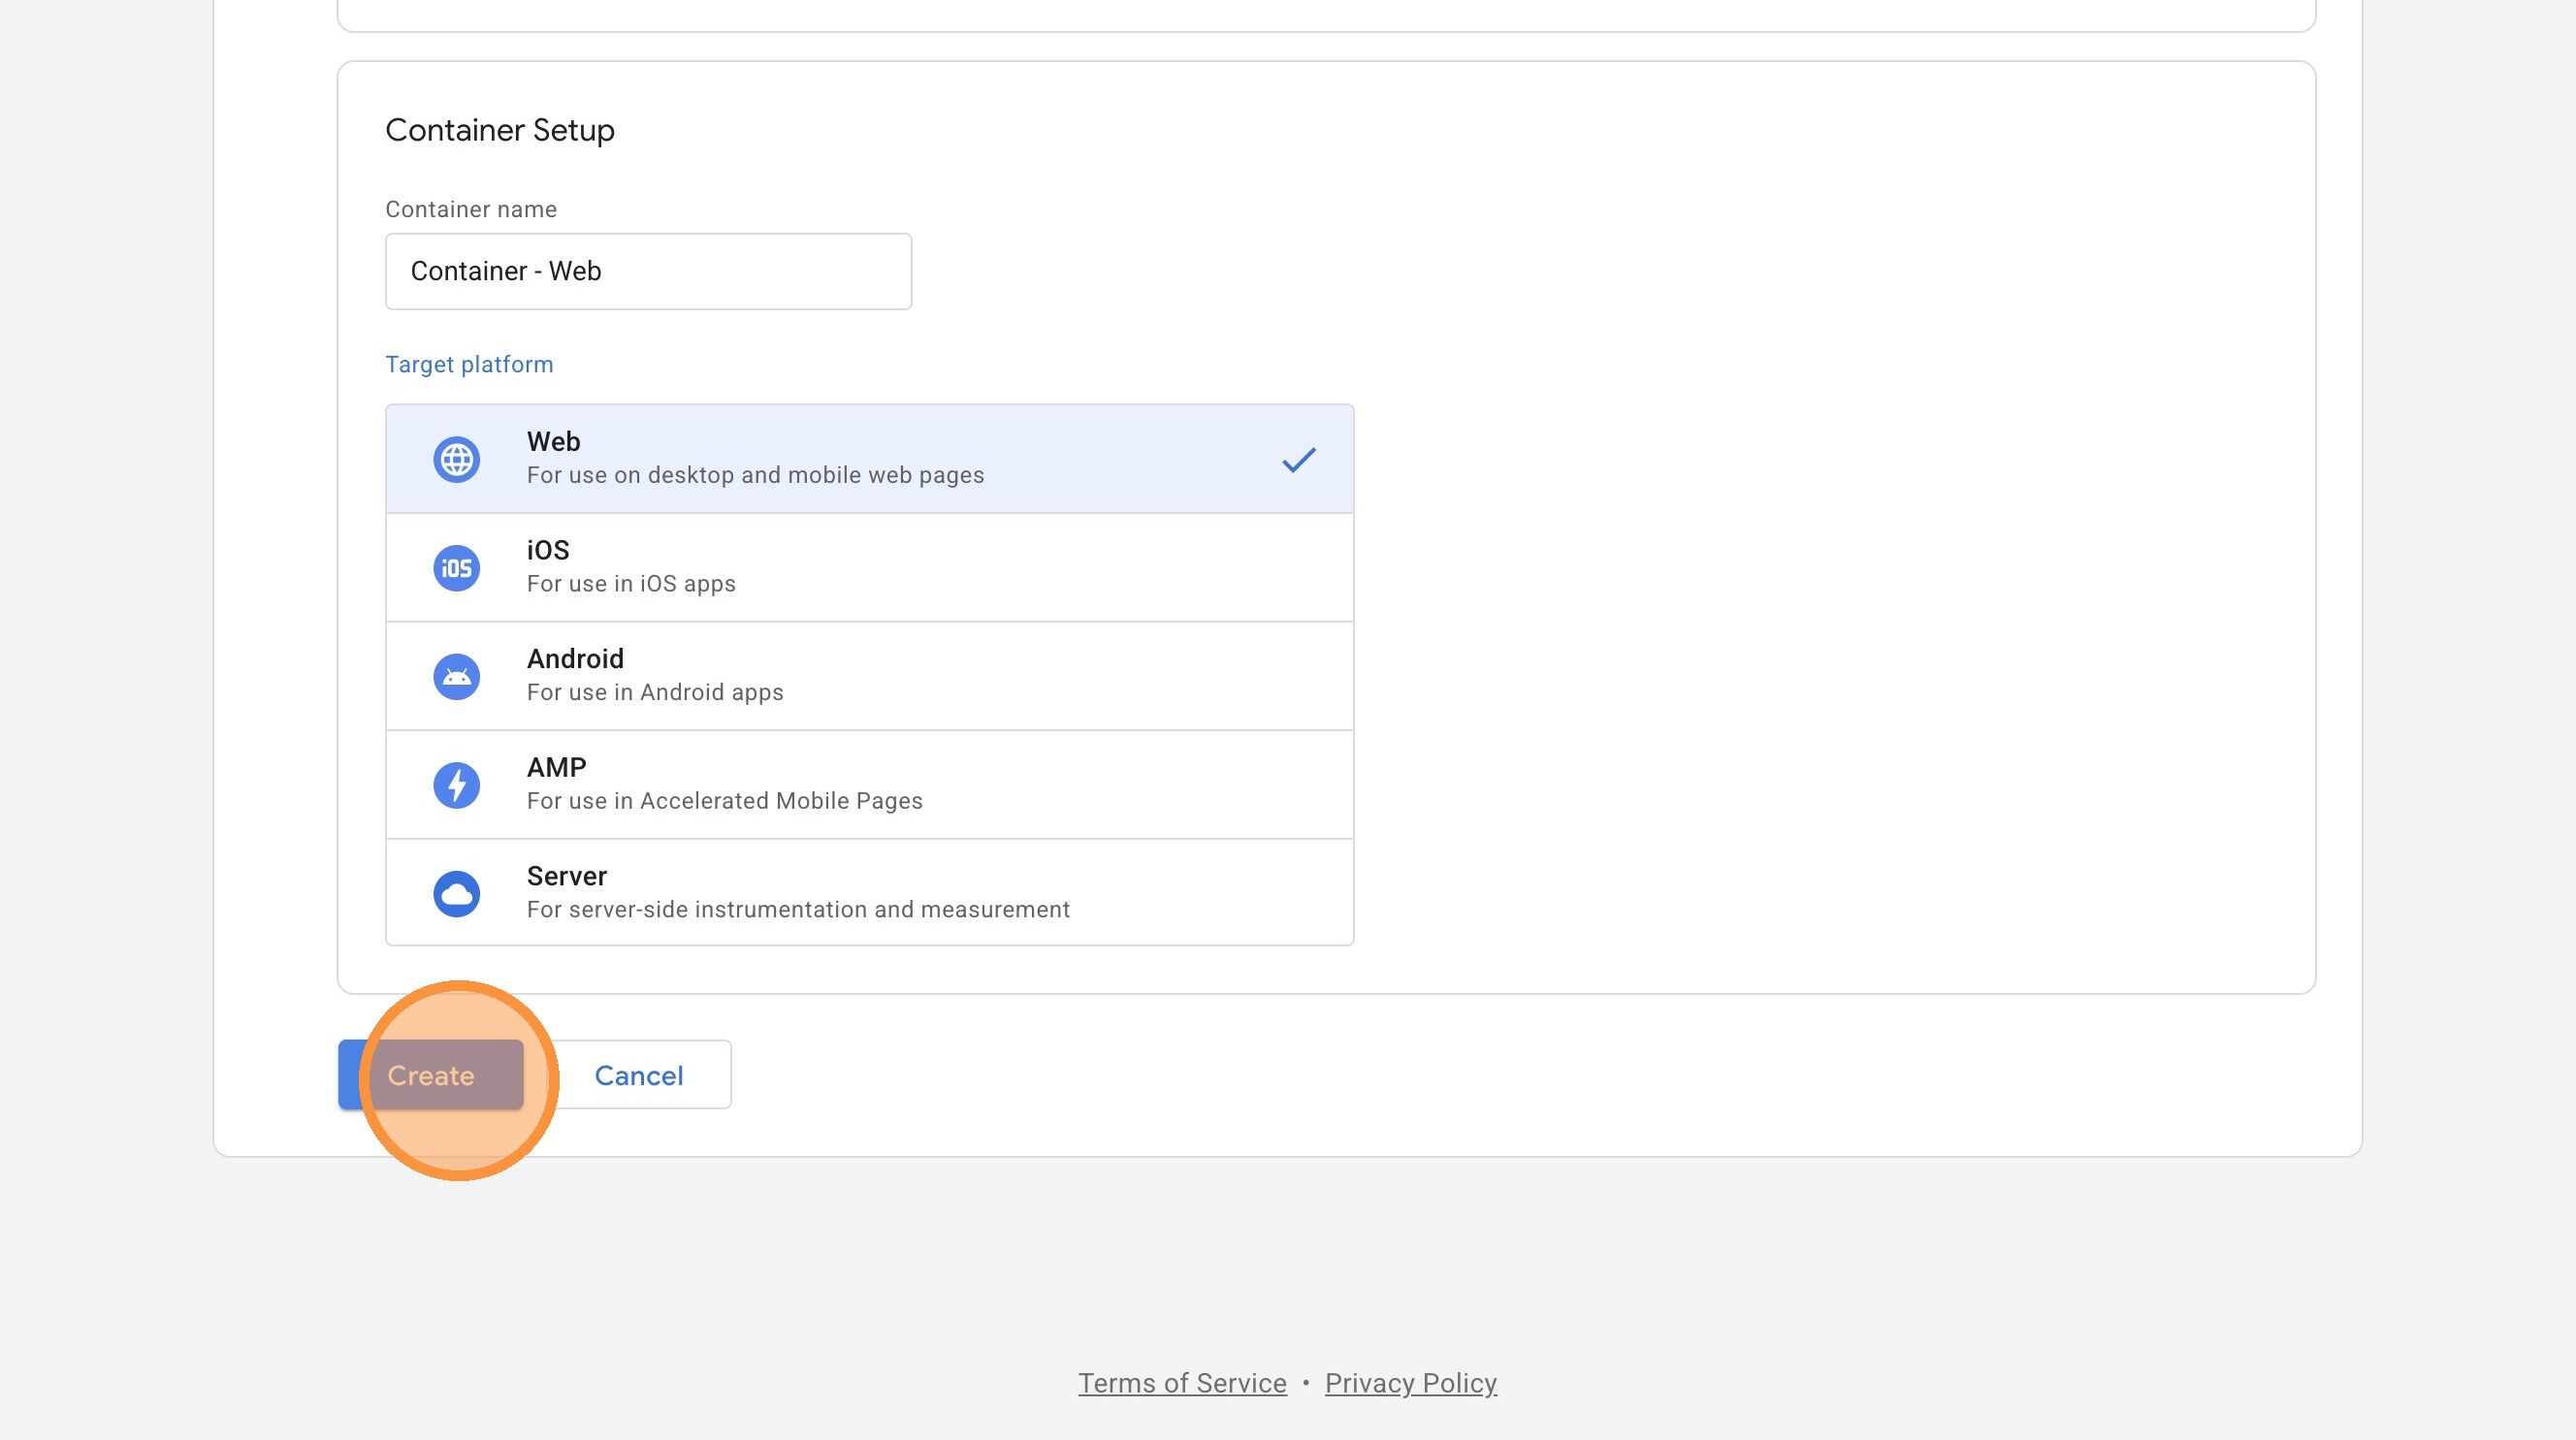
To create or confirm the web container:
- In the GTM account, create a new container if the site does not already have one.
- Choose the container type Web.
- Name it clearly for the production site, usually using the domain or brand name.
- If a container already exists, confirm it is the one the site actually uses in production and that it is safe to modify for this rollout.
- Record the container ID so you can recognize it later in the app.
-
3
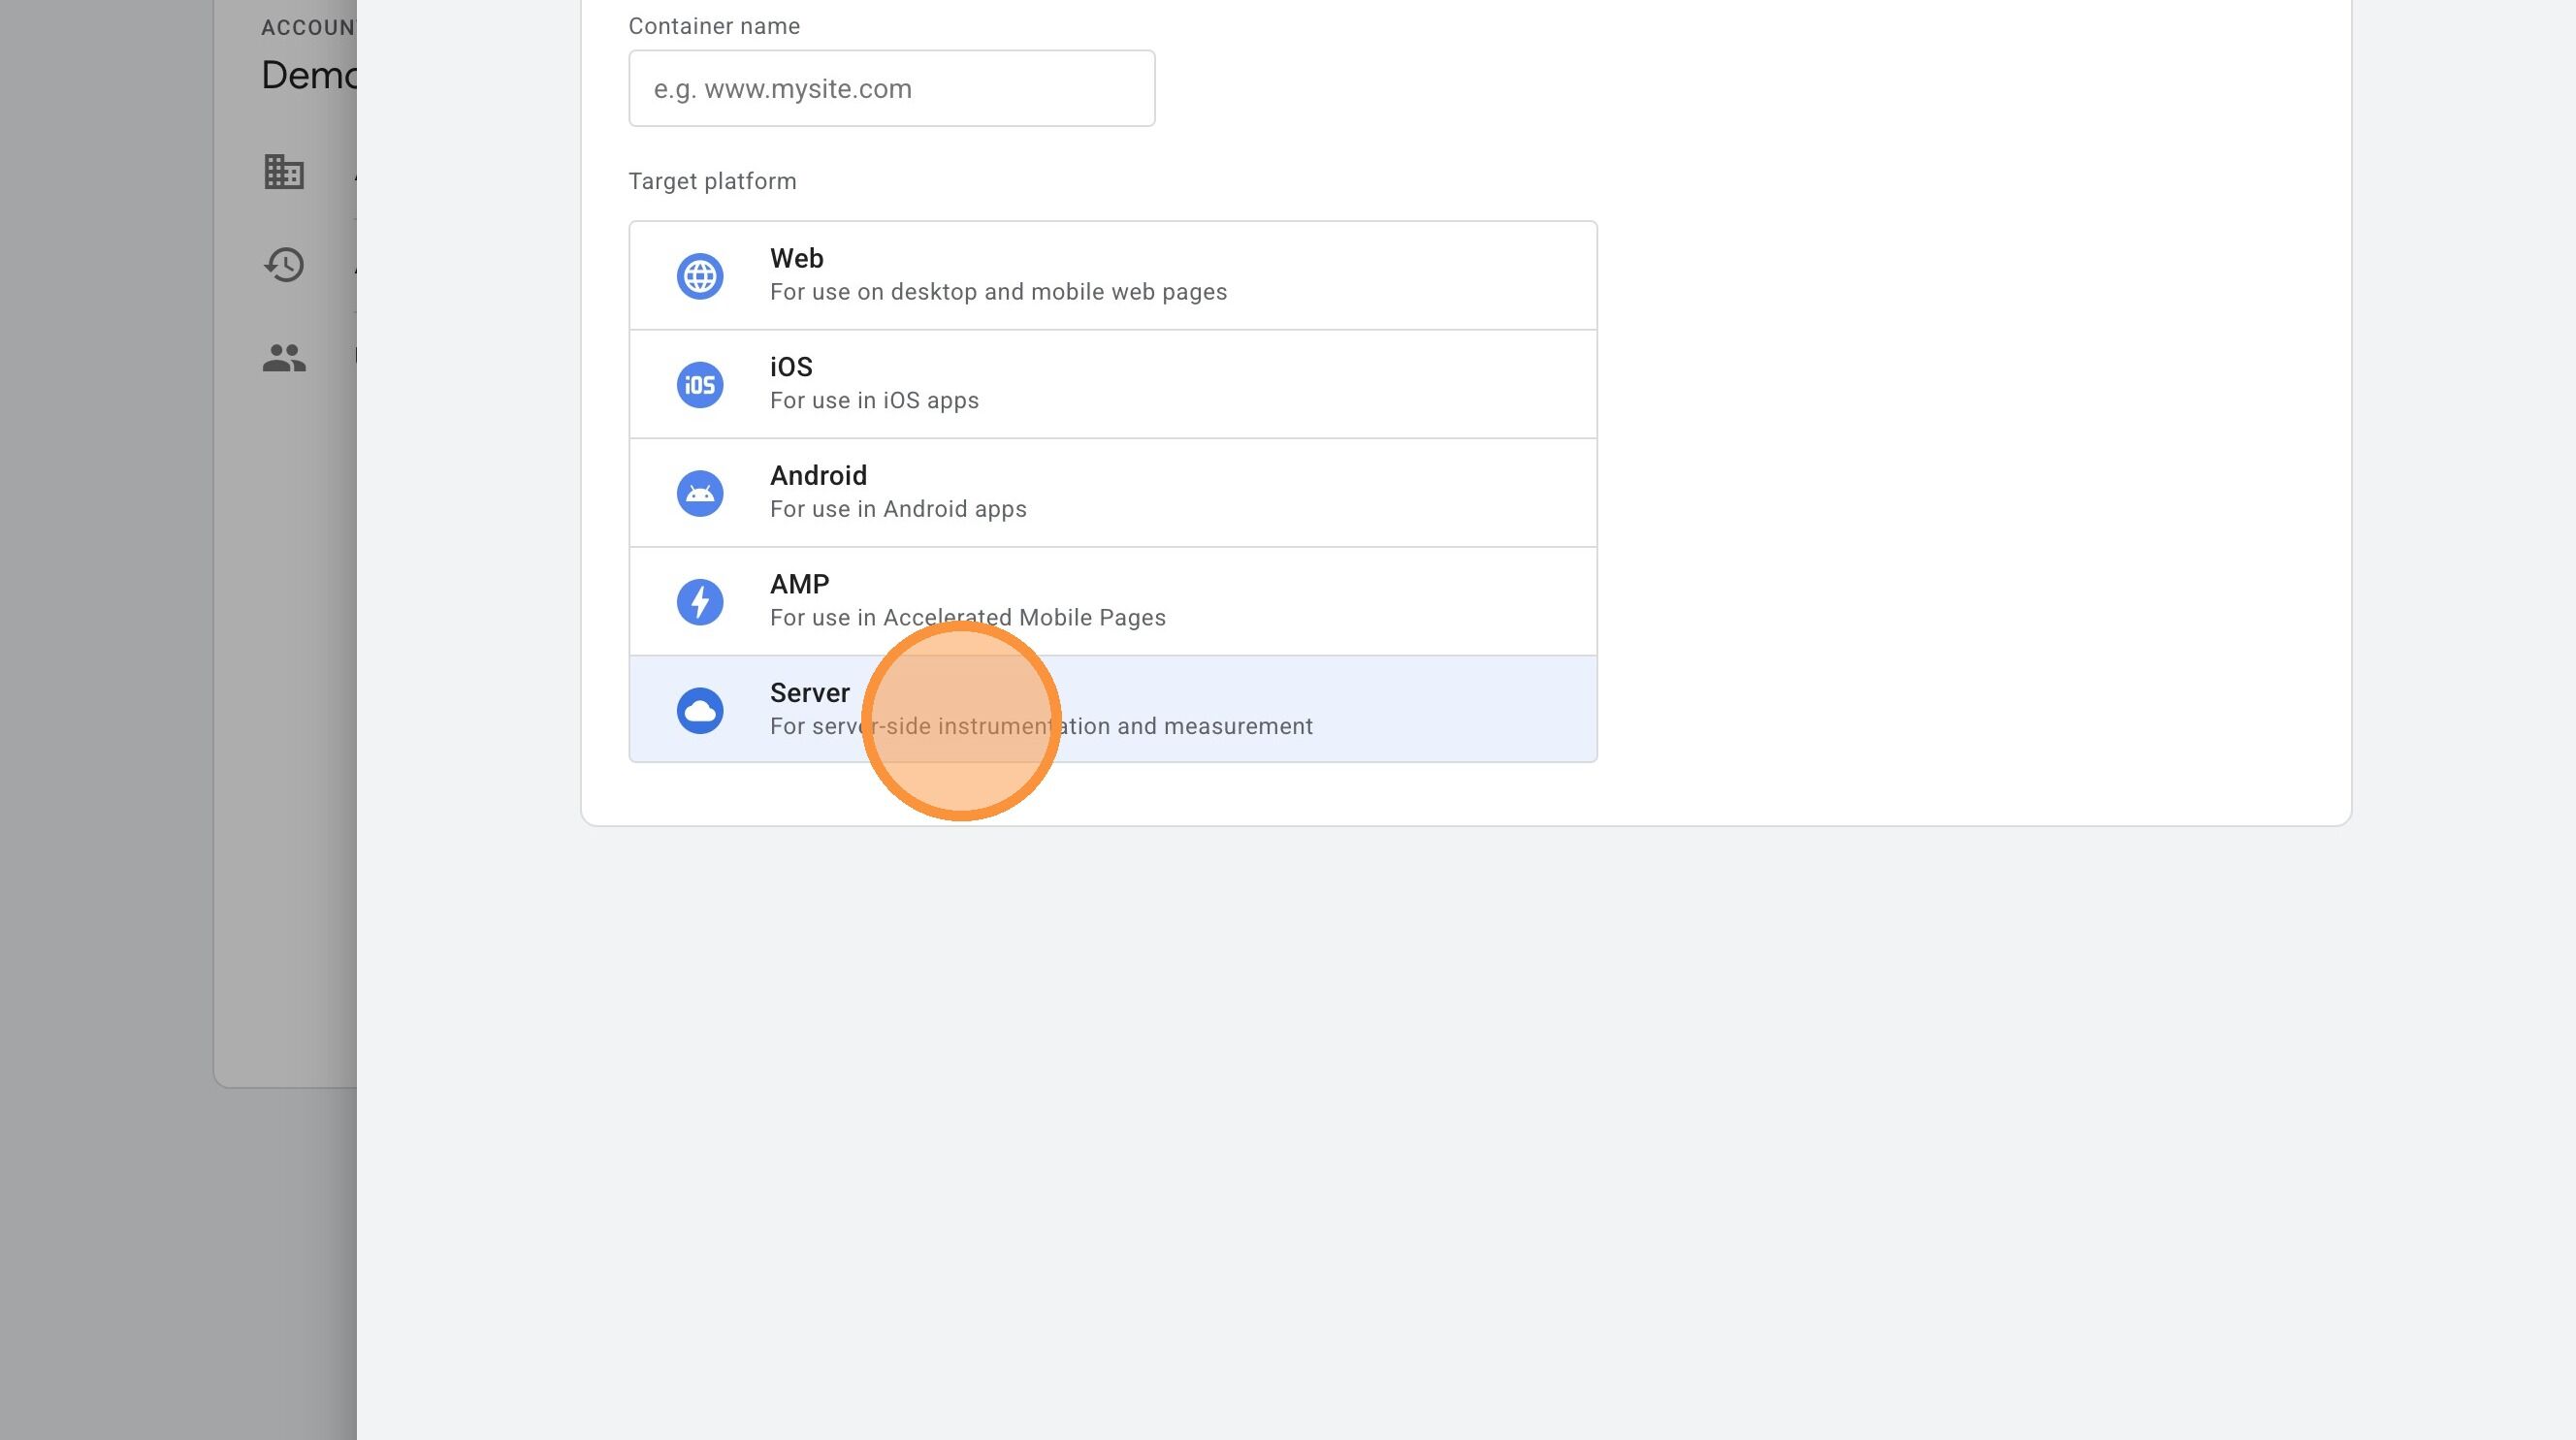
Server GTM container (optional at this stage)
The server container is separate from the web container and handles the server-side tagging path. If you already have one, confirm which container will be used for this setup.
If you don’t have a server container yet, you can create one later during the setup workflow when you reach the Build stage. It is not required for the initial scan.
To create or confirm the server container:
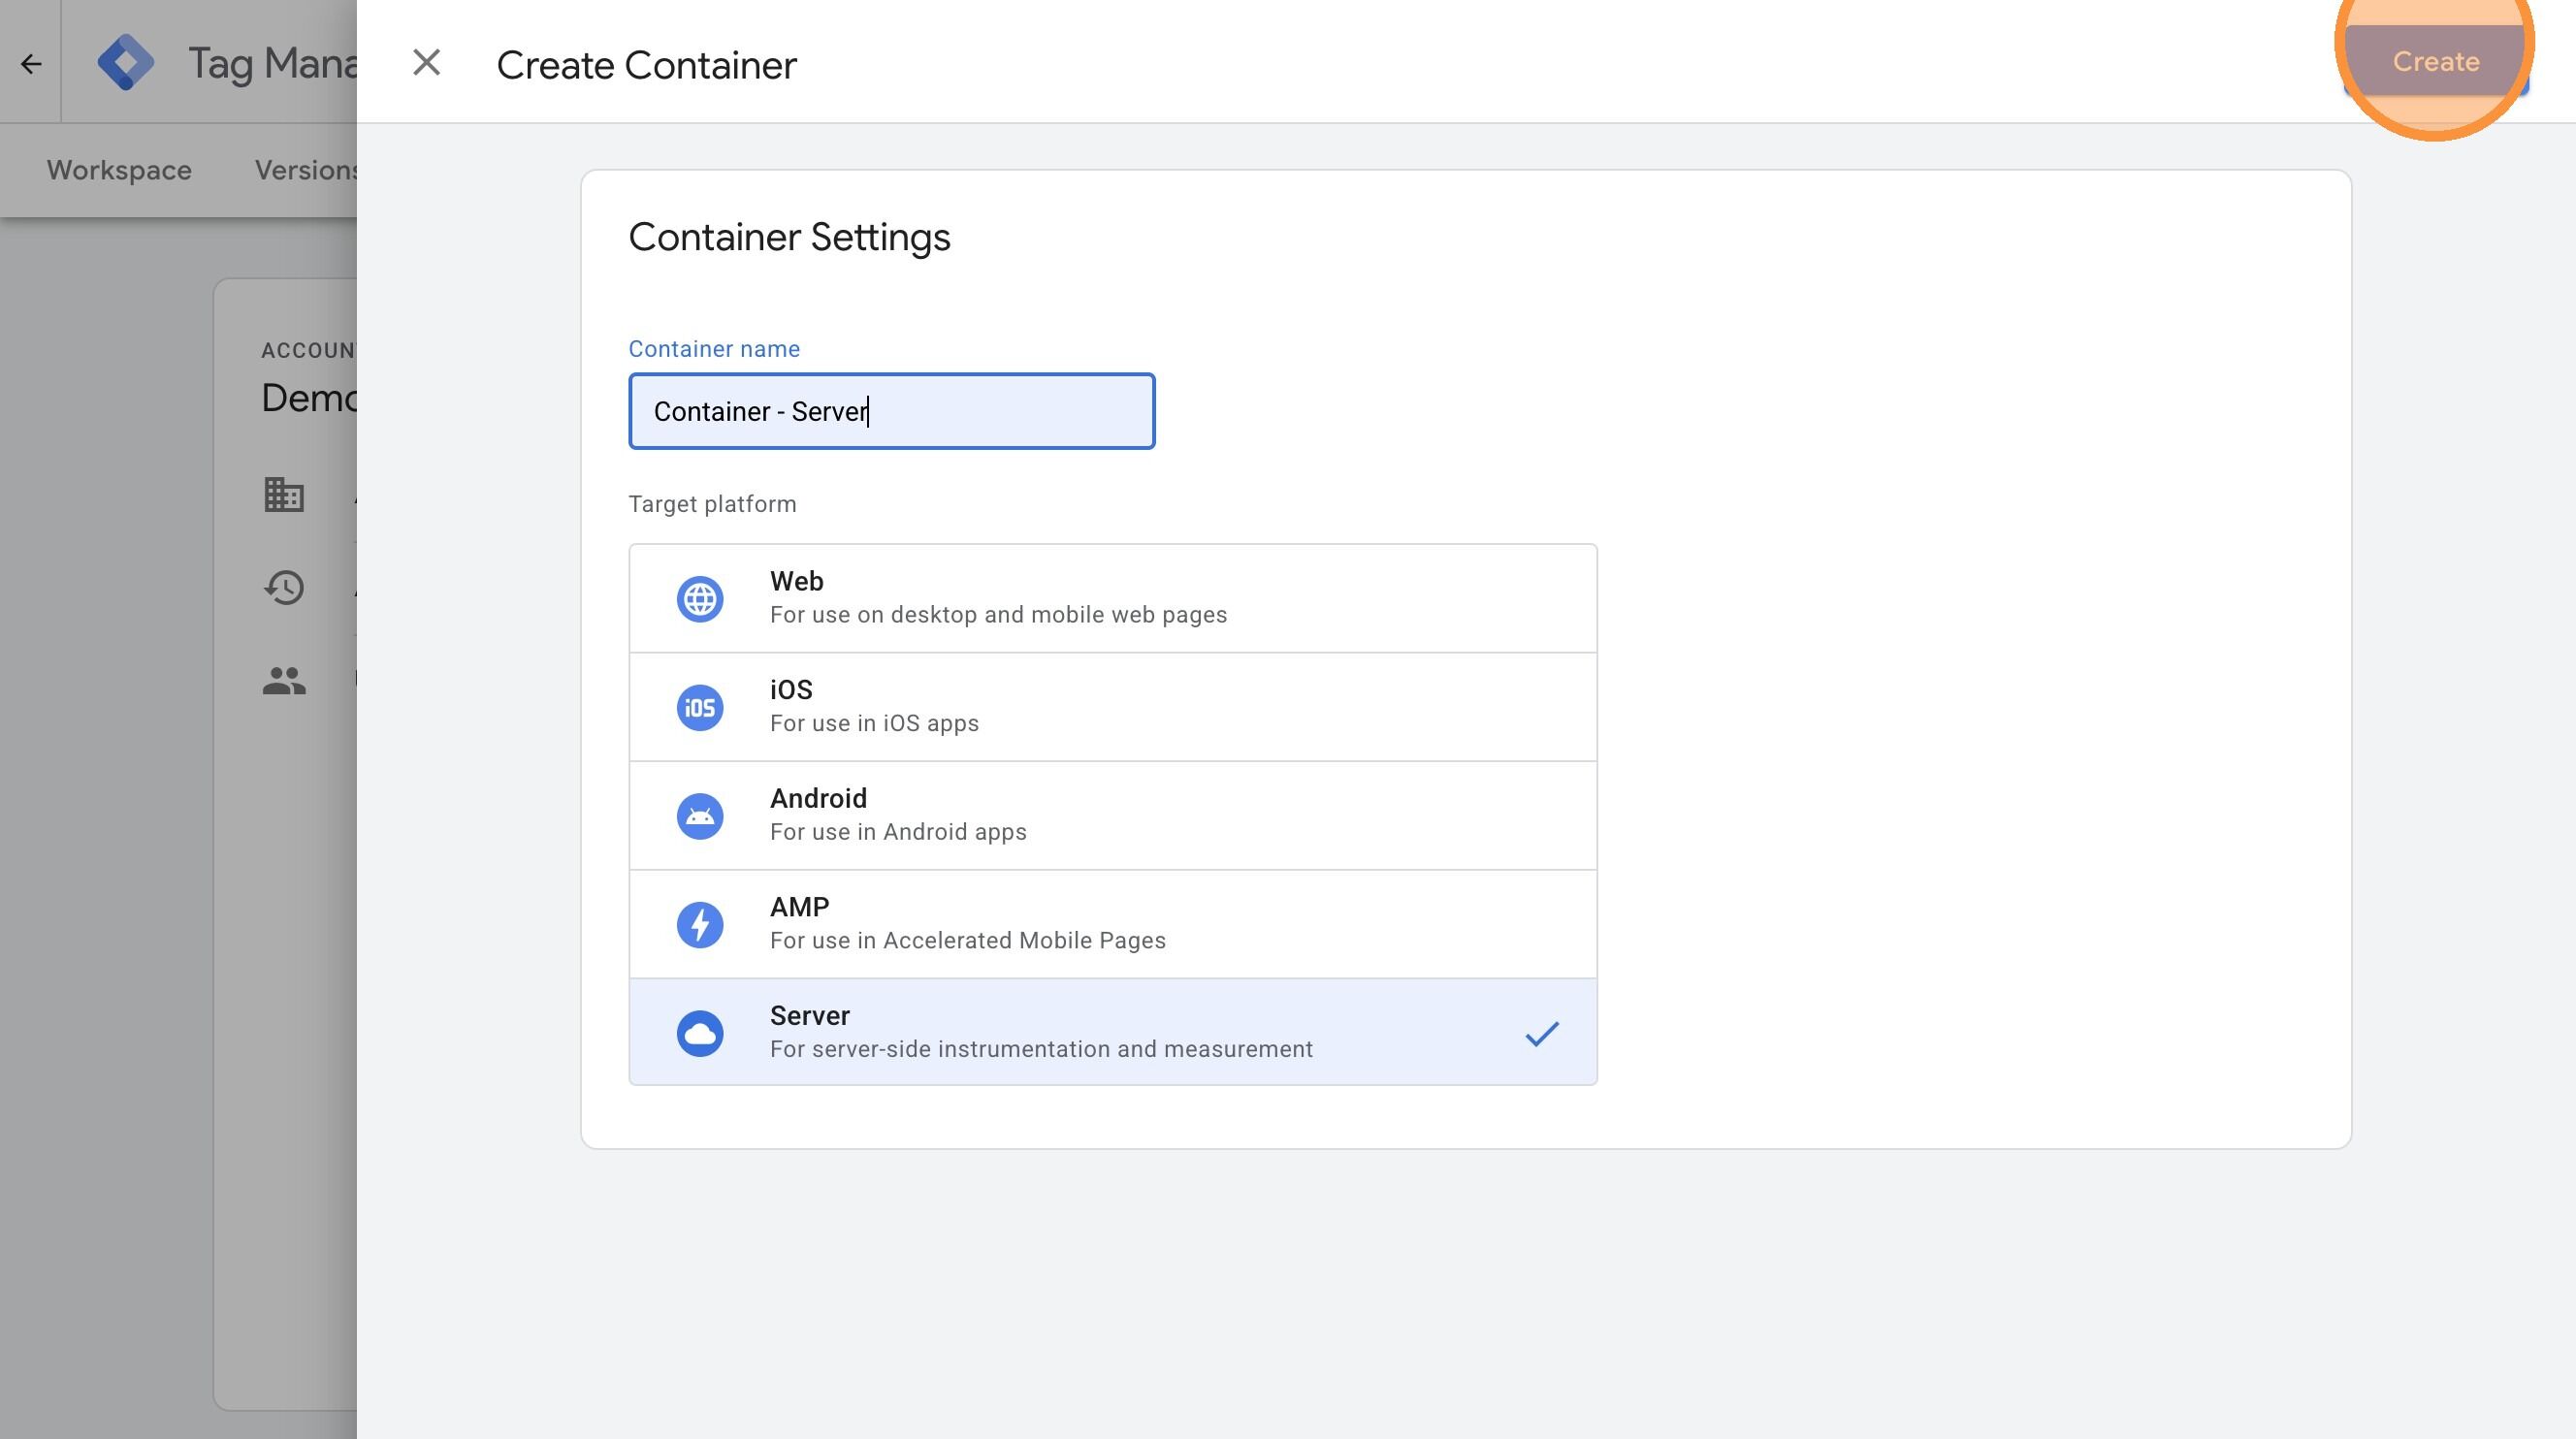
- In the GTM account, create a new container if a server container does not already exist for this implementation.
- Choose the container type Server.
- Name it clearly so it is easy to distinguish from the web container.
- Record the server container ID.
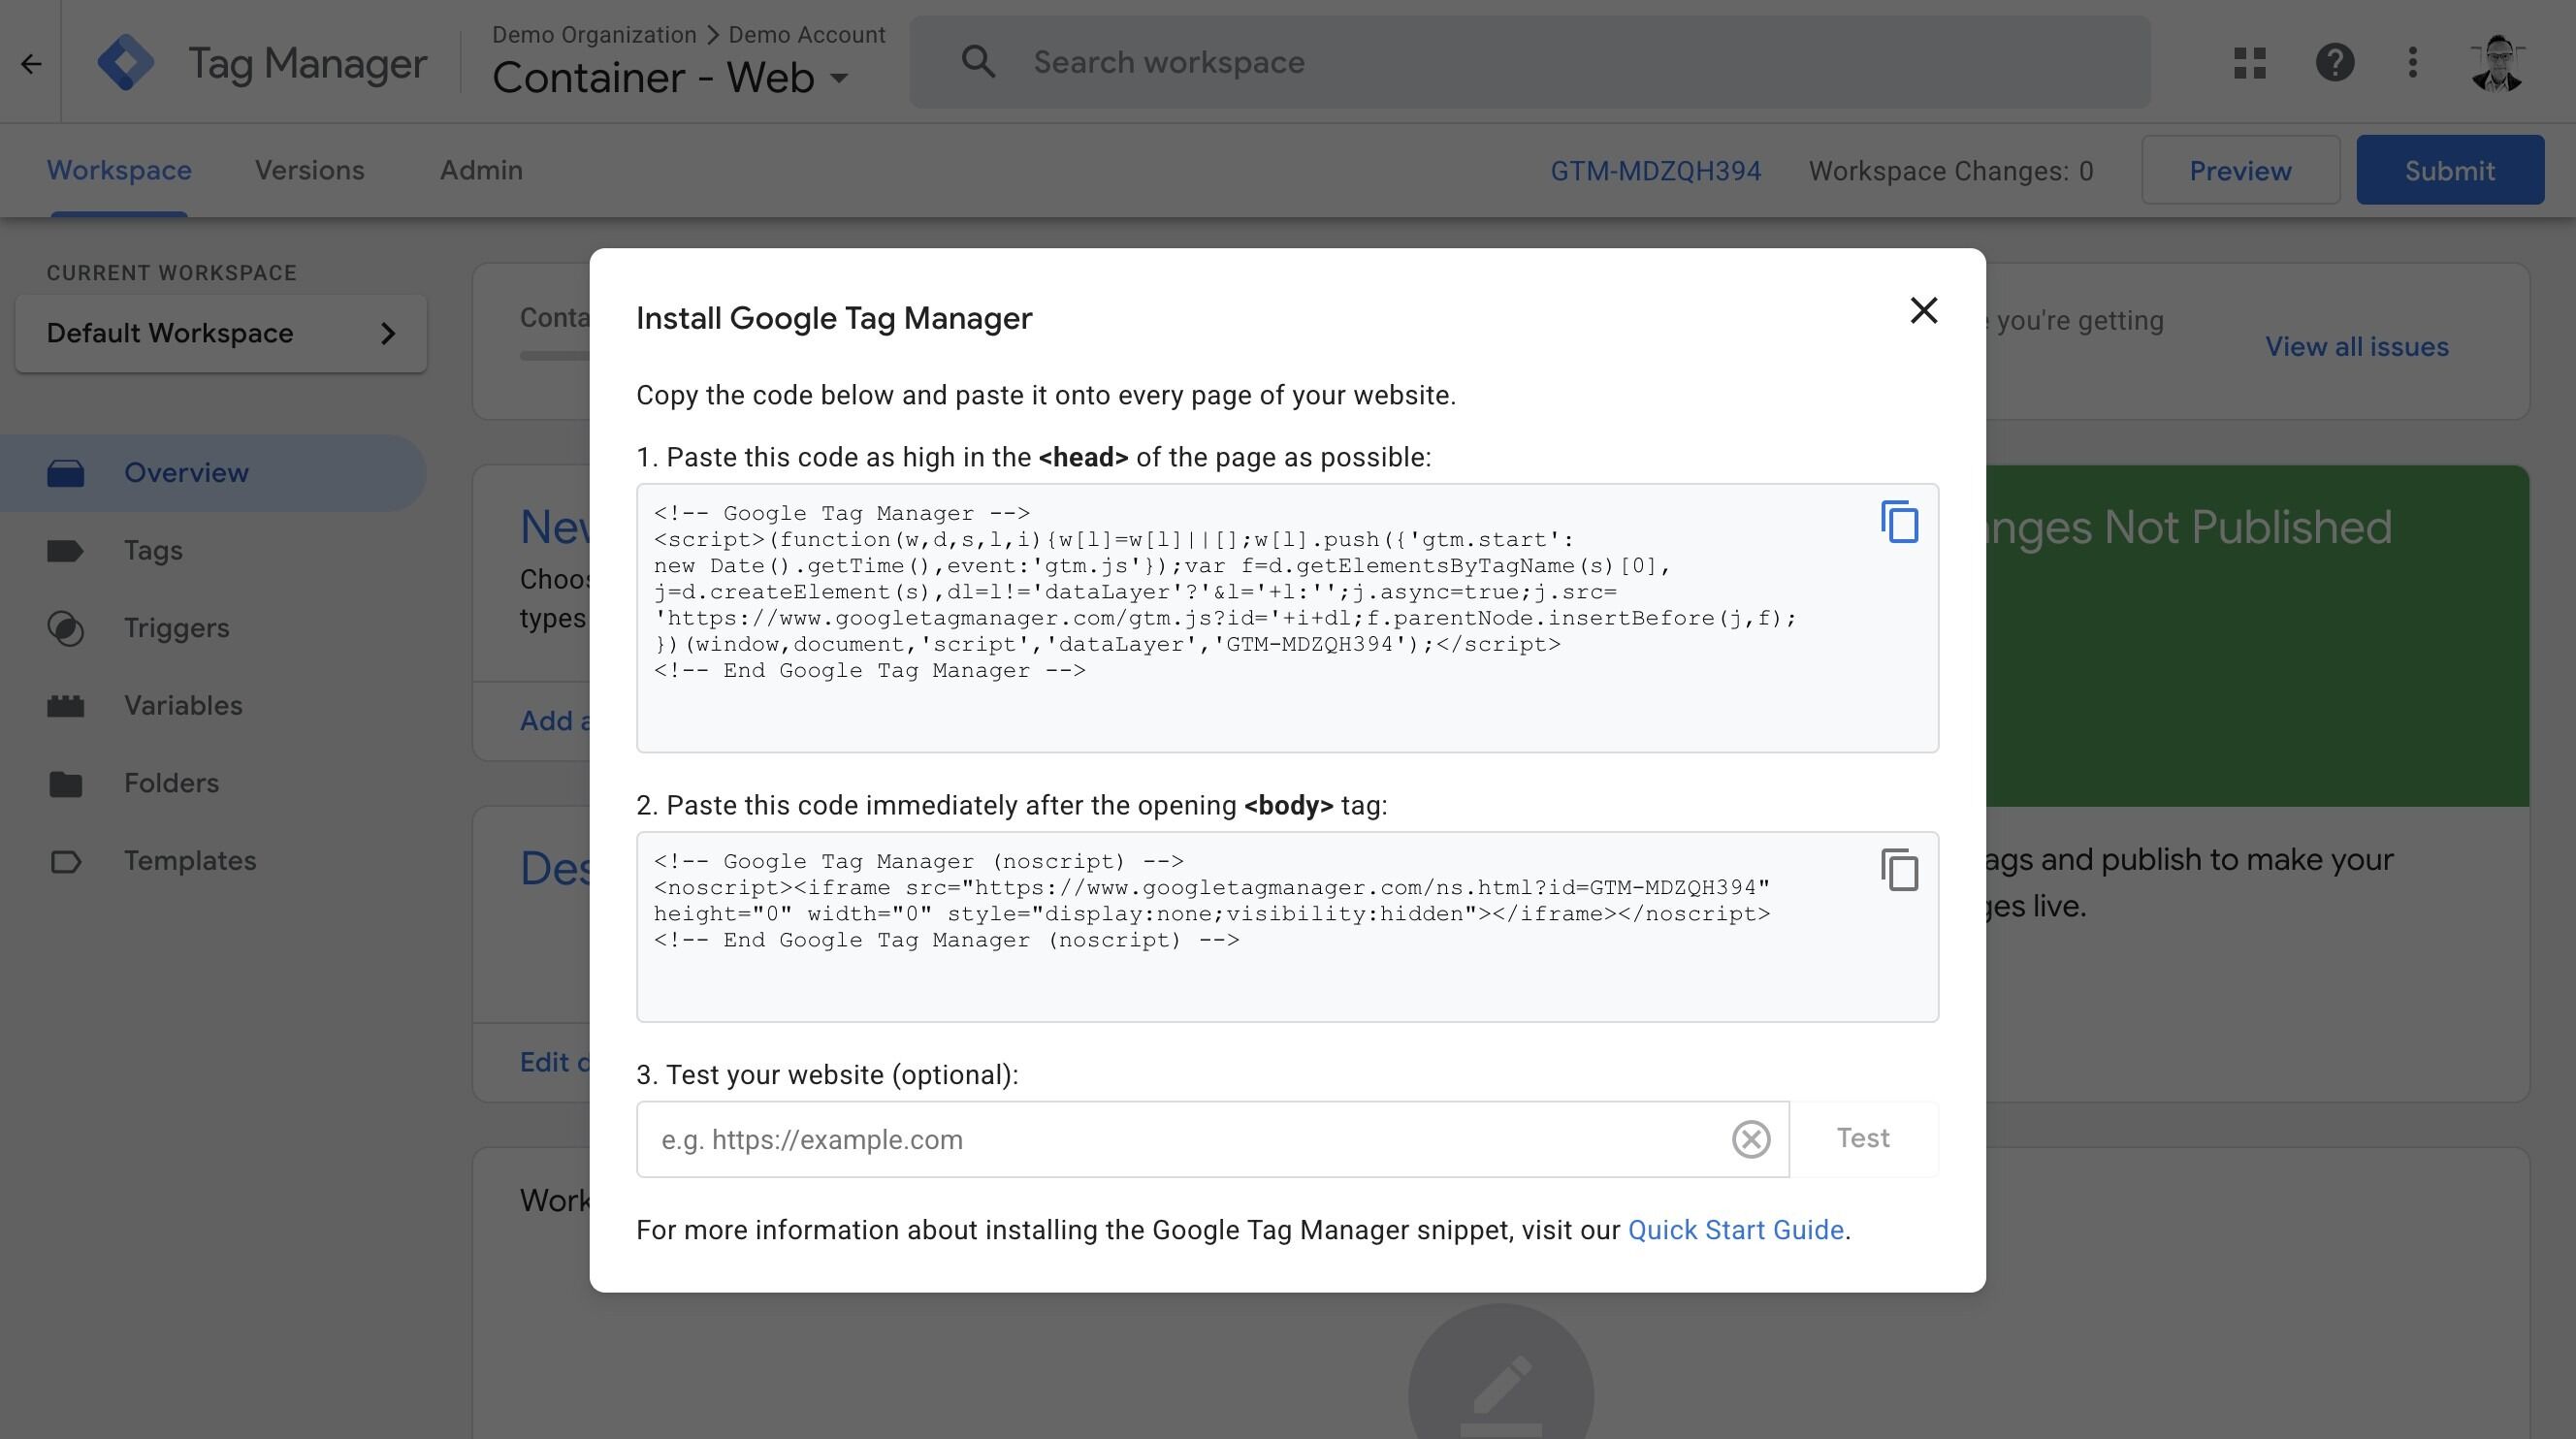
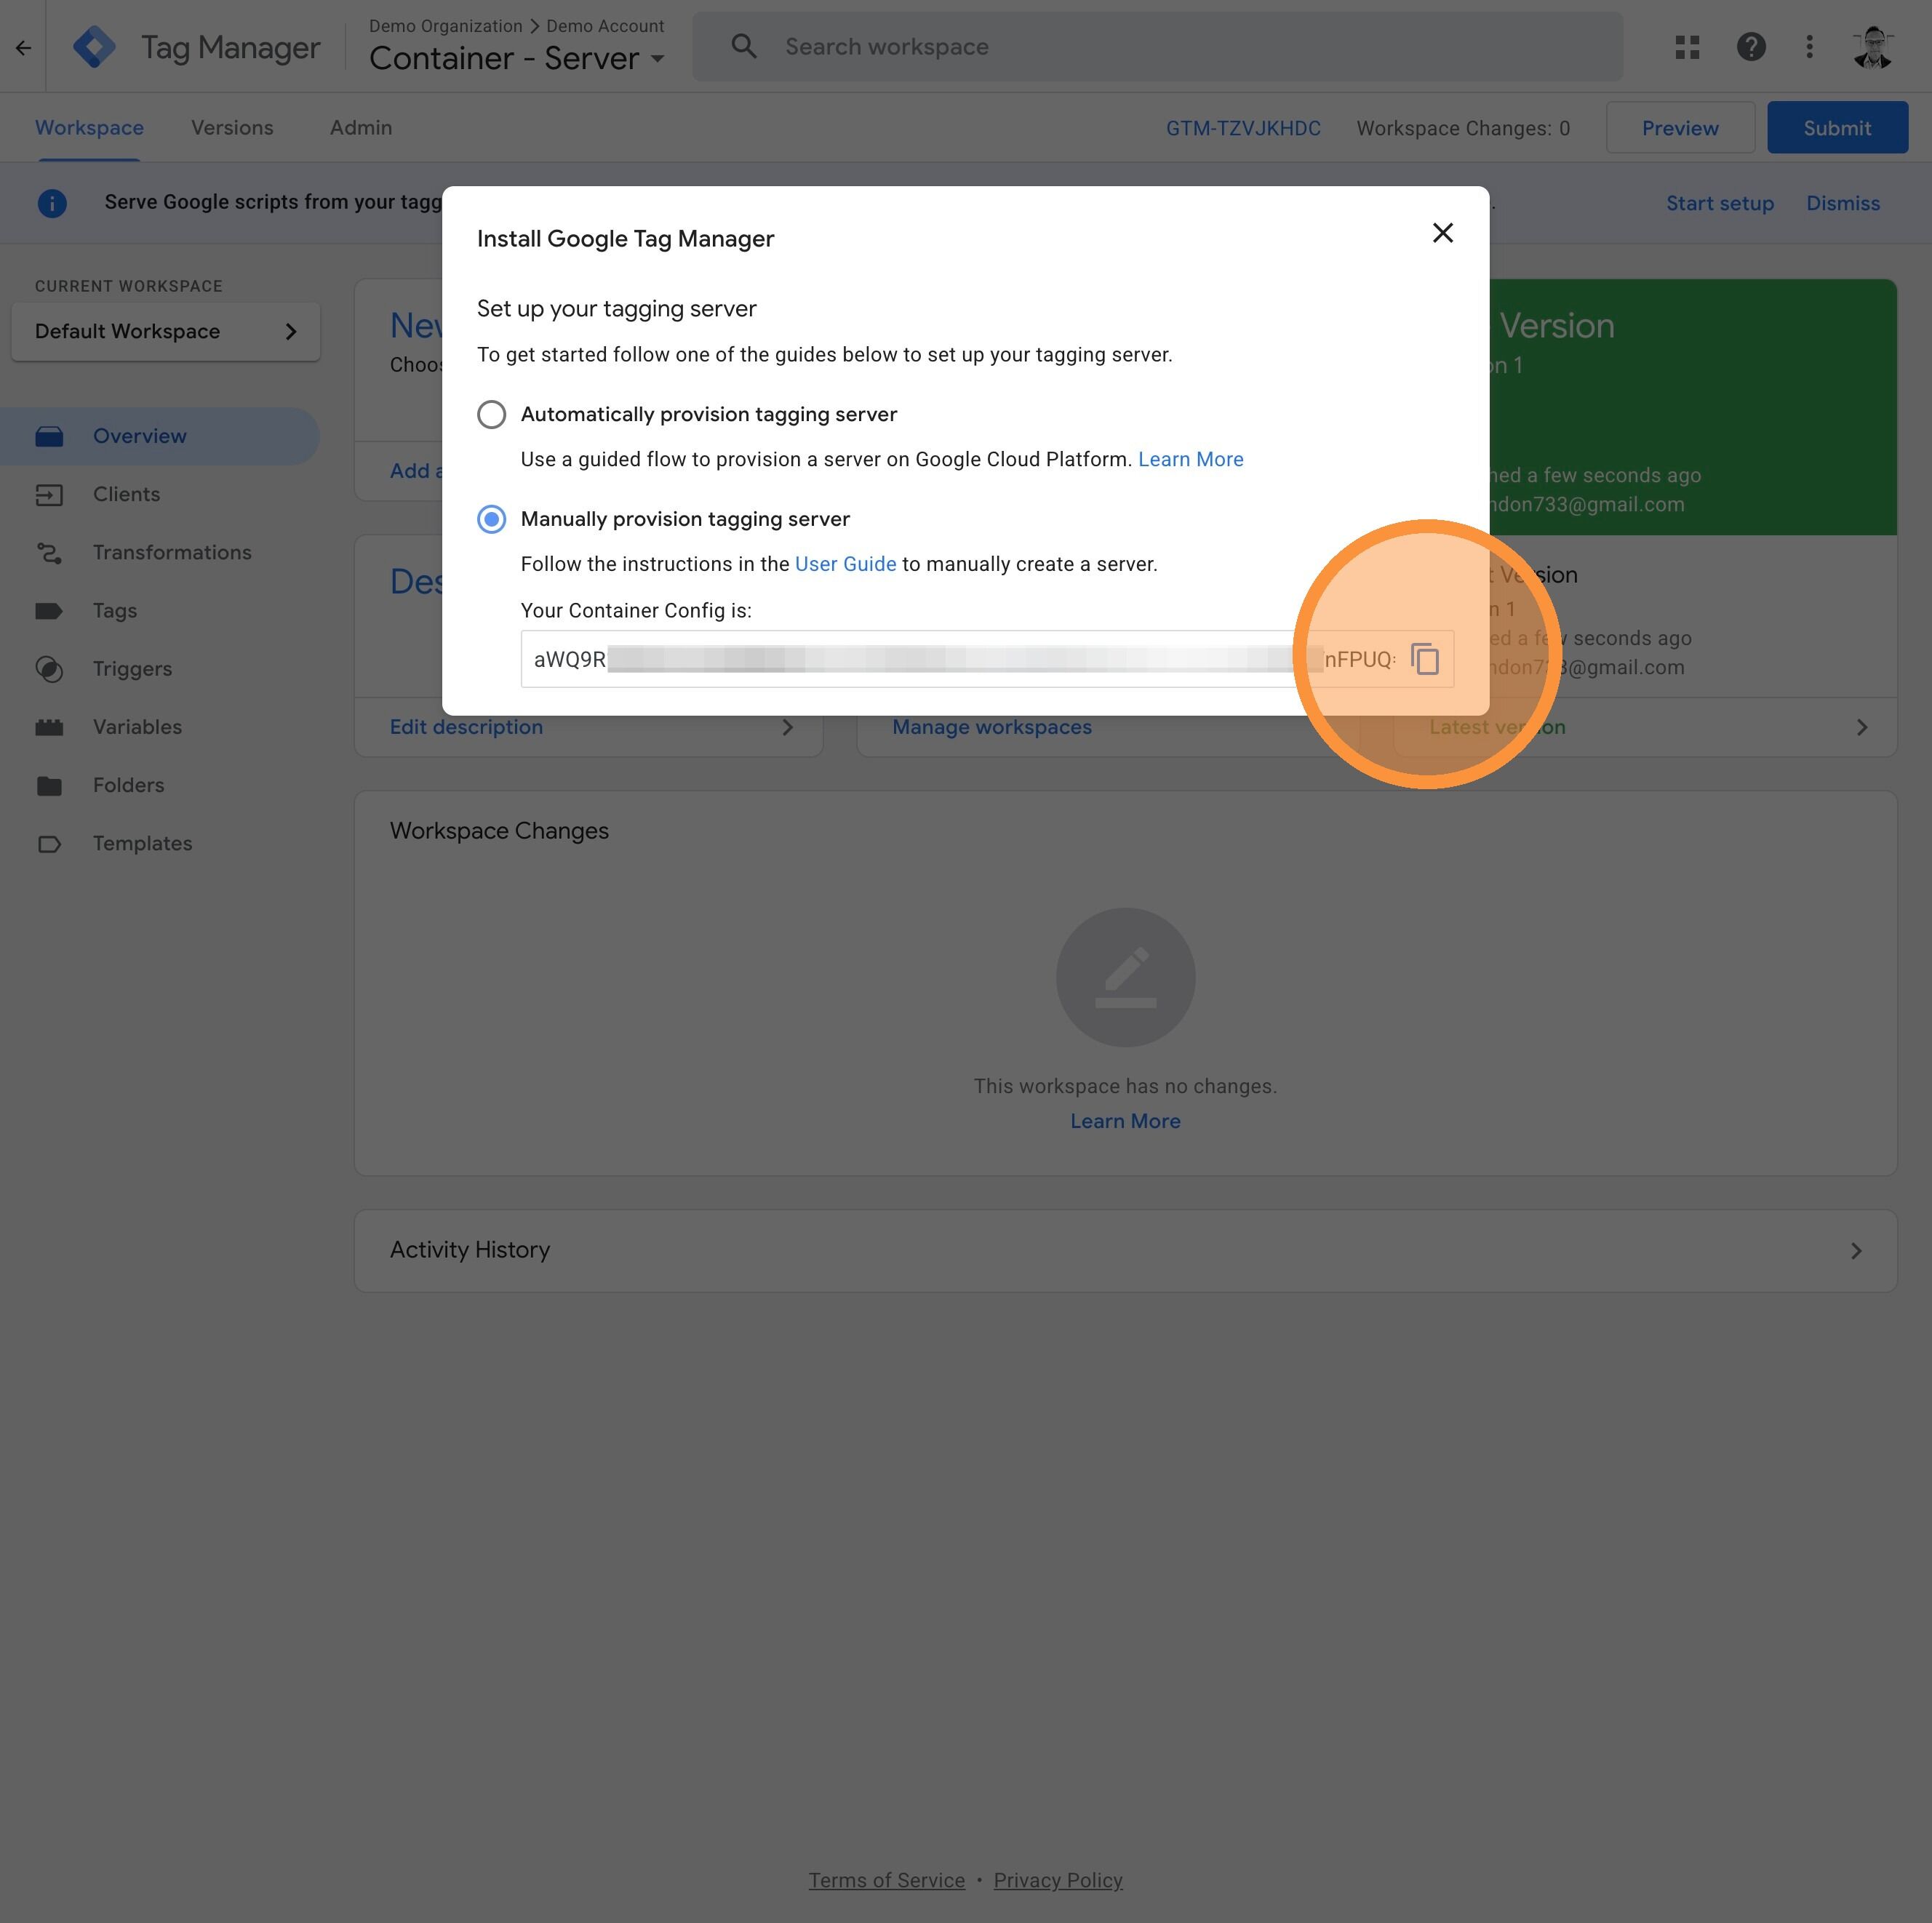
- Copy the Container Config code shown after creation. You will need this when deploying the server container to Cloud Run in Step 3. You can also retrieve it later from Admin > Container Settings.
- Make sure the container is intended to be paired with the same site and rollout as the web container above.
-
4
Confirm who can edit, review, and publish container changes
Later steps in this guide assume you can make container changes without getting blocked by ownership confusion. Confirm who can edit workspaces, who can approve or publish versions, and whether the same people own both containers.
If the ownership model is split across teams, make that explicit now so the rollout does not stall when a later step needs a publish or container change.
To confirm the ownership model:
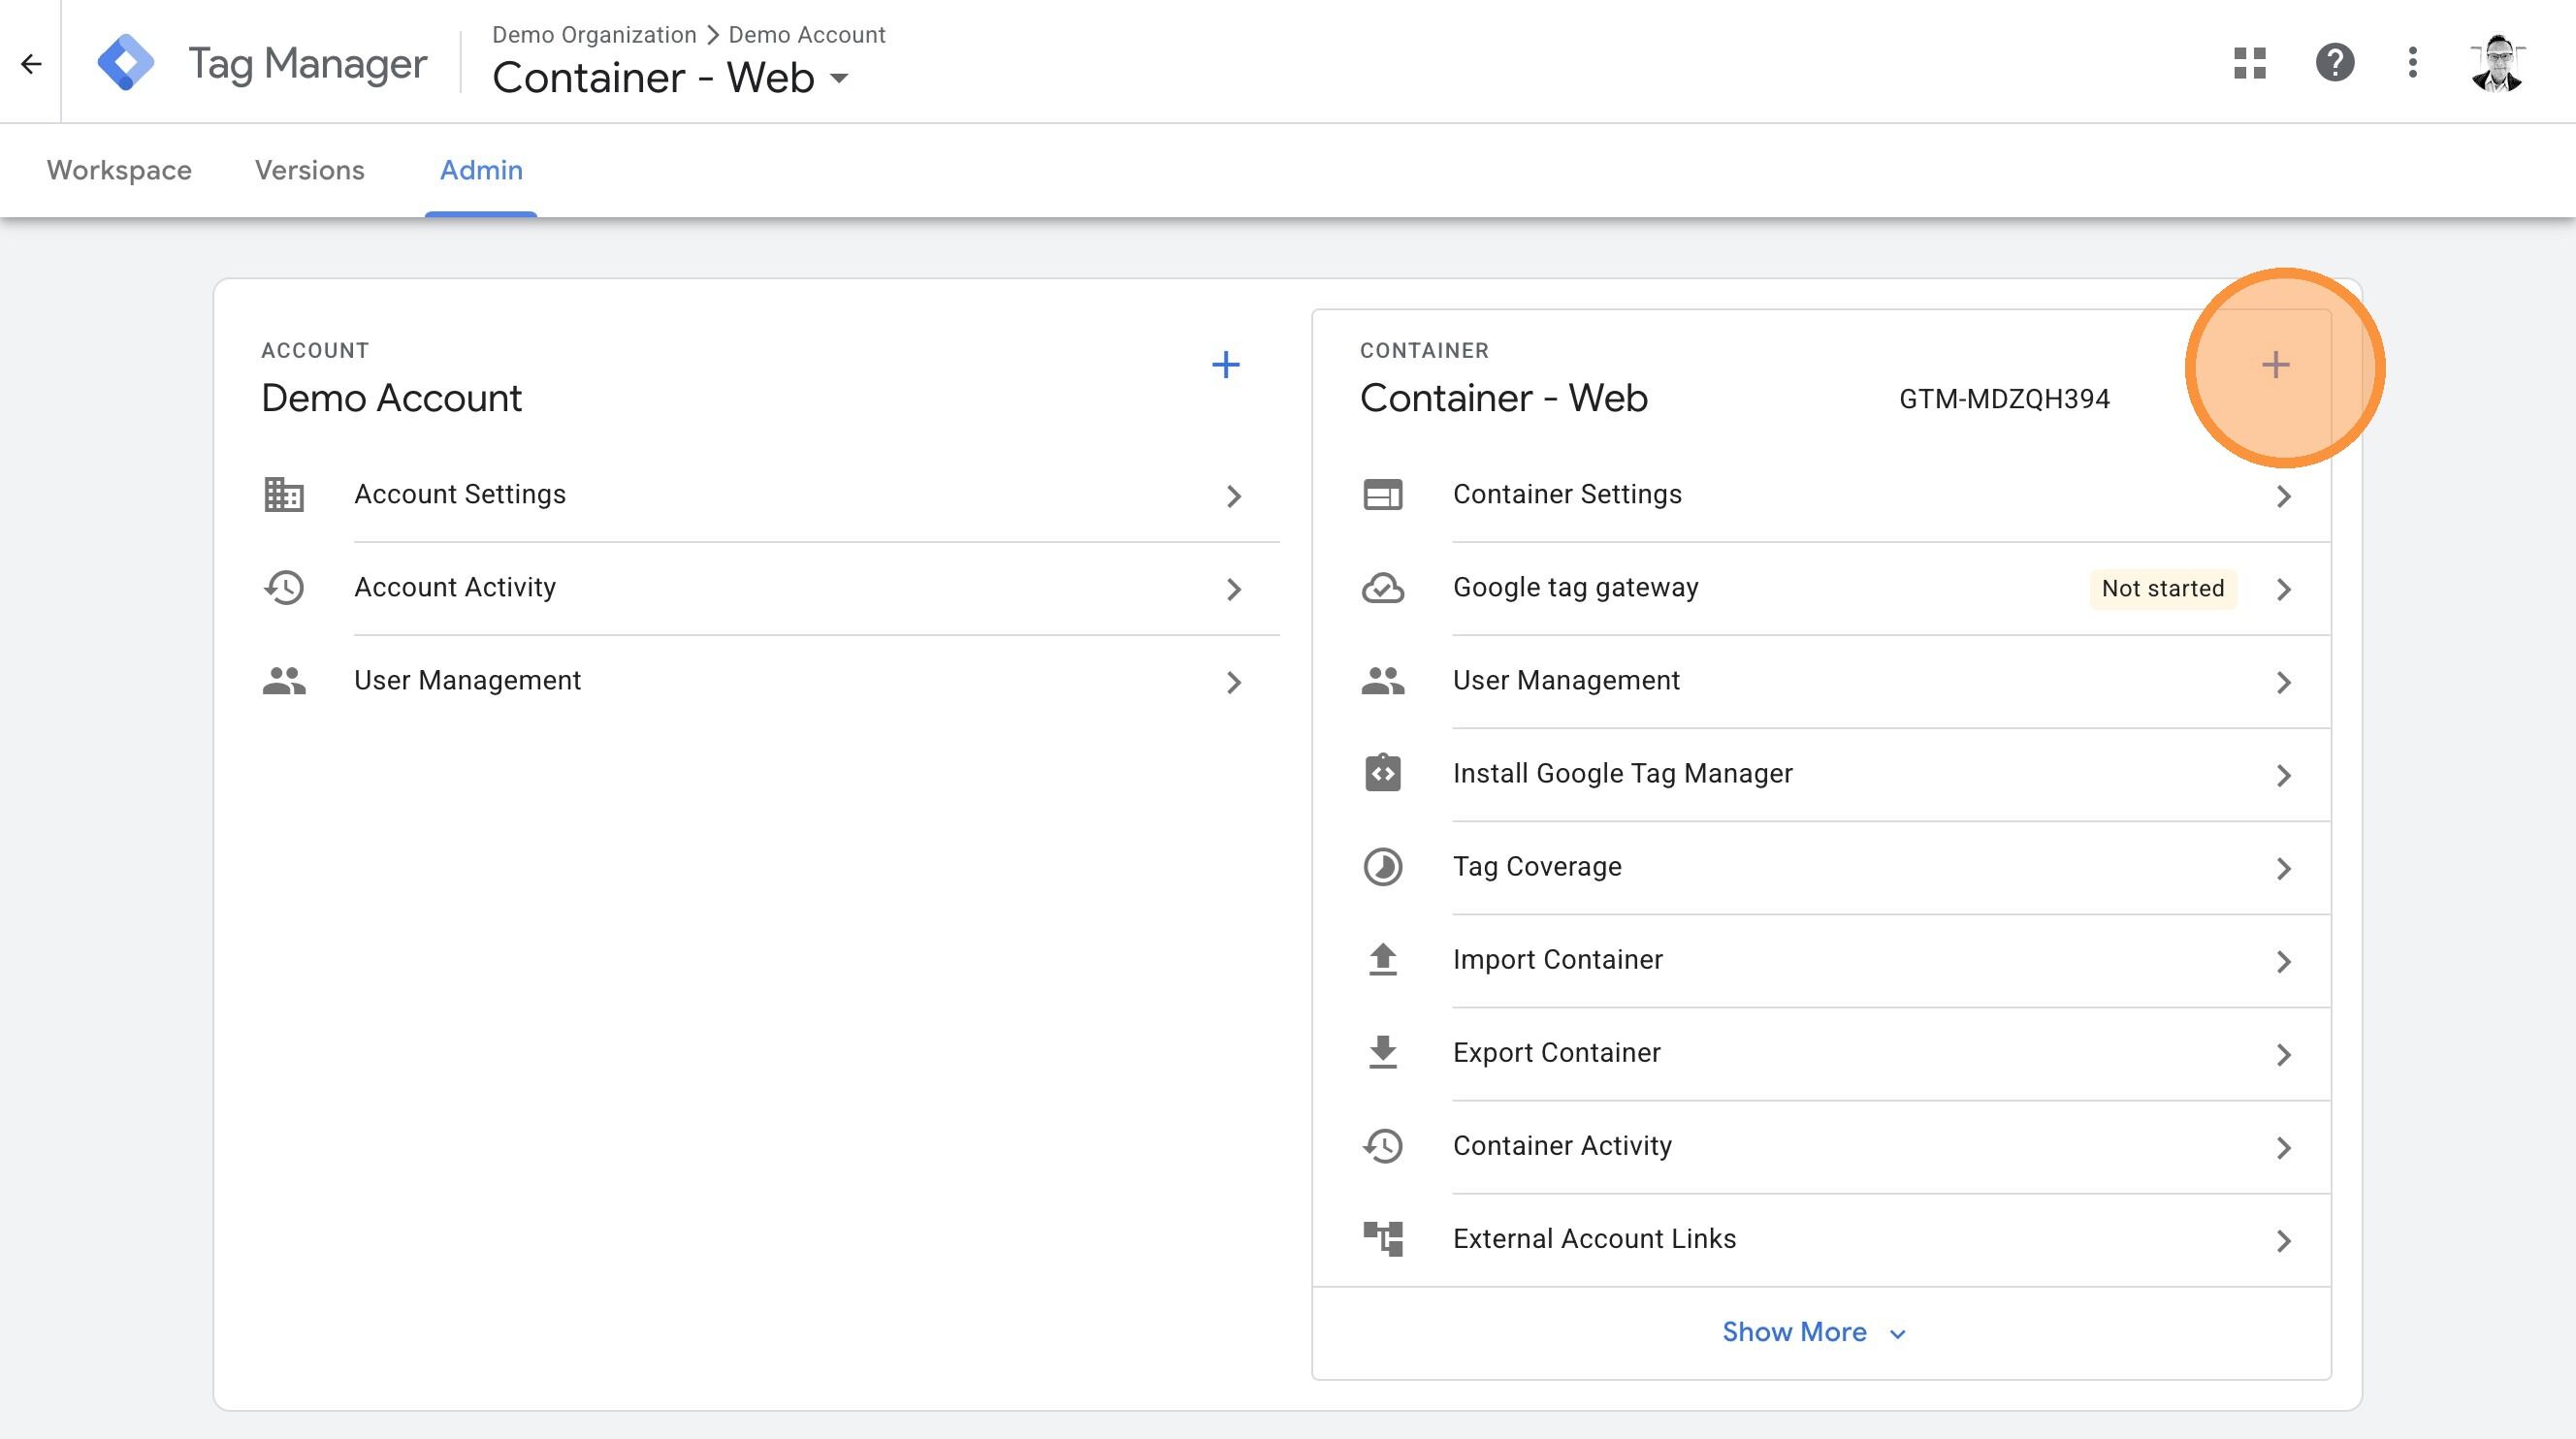
- Open each container and review the users and permissions.
- Confirm who has edit access, who can approve changes, and who can publish.
- Decide whether the rollout will reuse the default workspace or use a dedicated workspace for the setup work.
- Write down who needs to be involved when web or server container changes are ready to publish.
-
5
Be ready to bind the same GTM containers inside the app later
Once Step 2 begins, the app expects you to bind one web GTM container and one server GTM container. That works best if the names and IDs are already clear and unambiguous before you get there.
Do the cleanup now if container naming is confusing or if multiple candidate containers could be mistaken for the correct ones later.
Done when
Your GTM setup is ready when:
- you can sign in to the correct GTM account and work in it
- you have one clear web container for the site
- if you have an existing server container, you have identified it
- the people needed to edit and publish container changes are known
In GTM, you can verify each of those items like this:
- Open GTM and confirm the correct account is selected.
- Confirm the web container for your site is present and clearly named.
- Record the web container ID.
- If a server container exists, record its container ID as well.
- Review container permissions to confirm the setup team can make and publish changes.
From there, go back to P.4 Settings in the Platform Setup Guide.